 Echolot
Realtime
Watch live order events over WebSocket and Server-Sent Events from the demo API, then chat over Socket.IO and read sensors over MQTT on servers on your Mac.
Realtime APIs keep a connection open and send messages both ways. In this tutorial you watch the demo shop's order feed over a WebSocket and as Server-Sent Events, then talk to the shop's support desk over Socket.IO and read warehouse temperatures over MQTT, side by side.
- Time: 20 minutes.
- You need: the Alpenglow workspace with No Environment chosen. For
Socket.IO and MQTT, the local servers: run
bun run realtimeinexamples/servers. - You learn: connecting, saved messages, the live log, event streams, namespaces and acknowledgements, subscriptions, QoS and retained messages.
1. WebSocket: the order feed
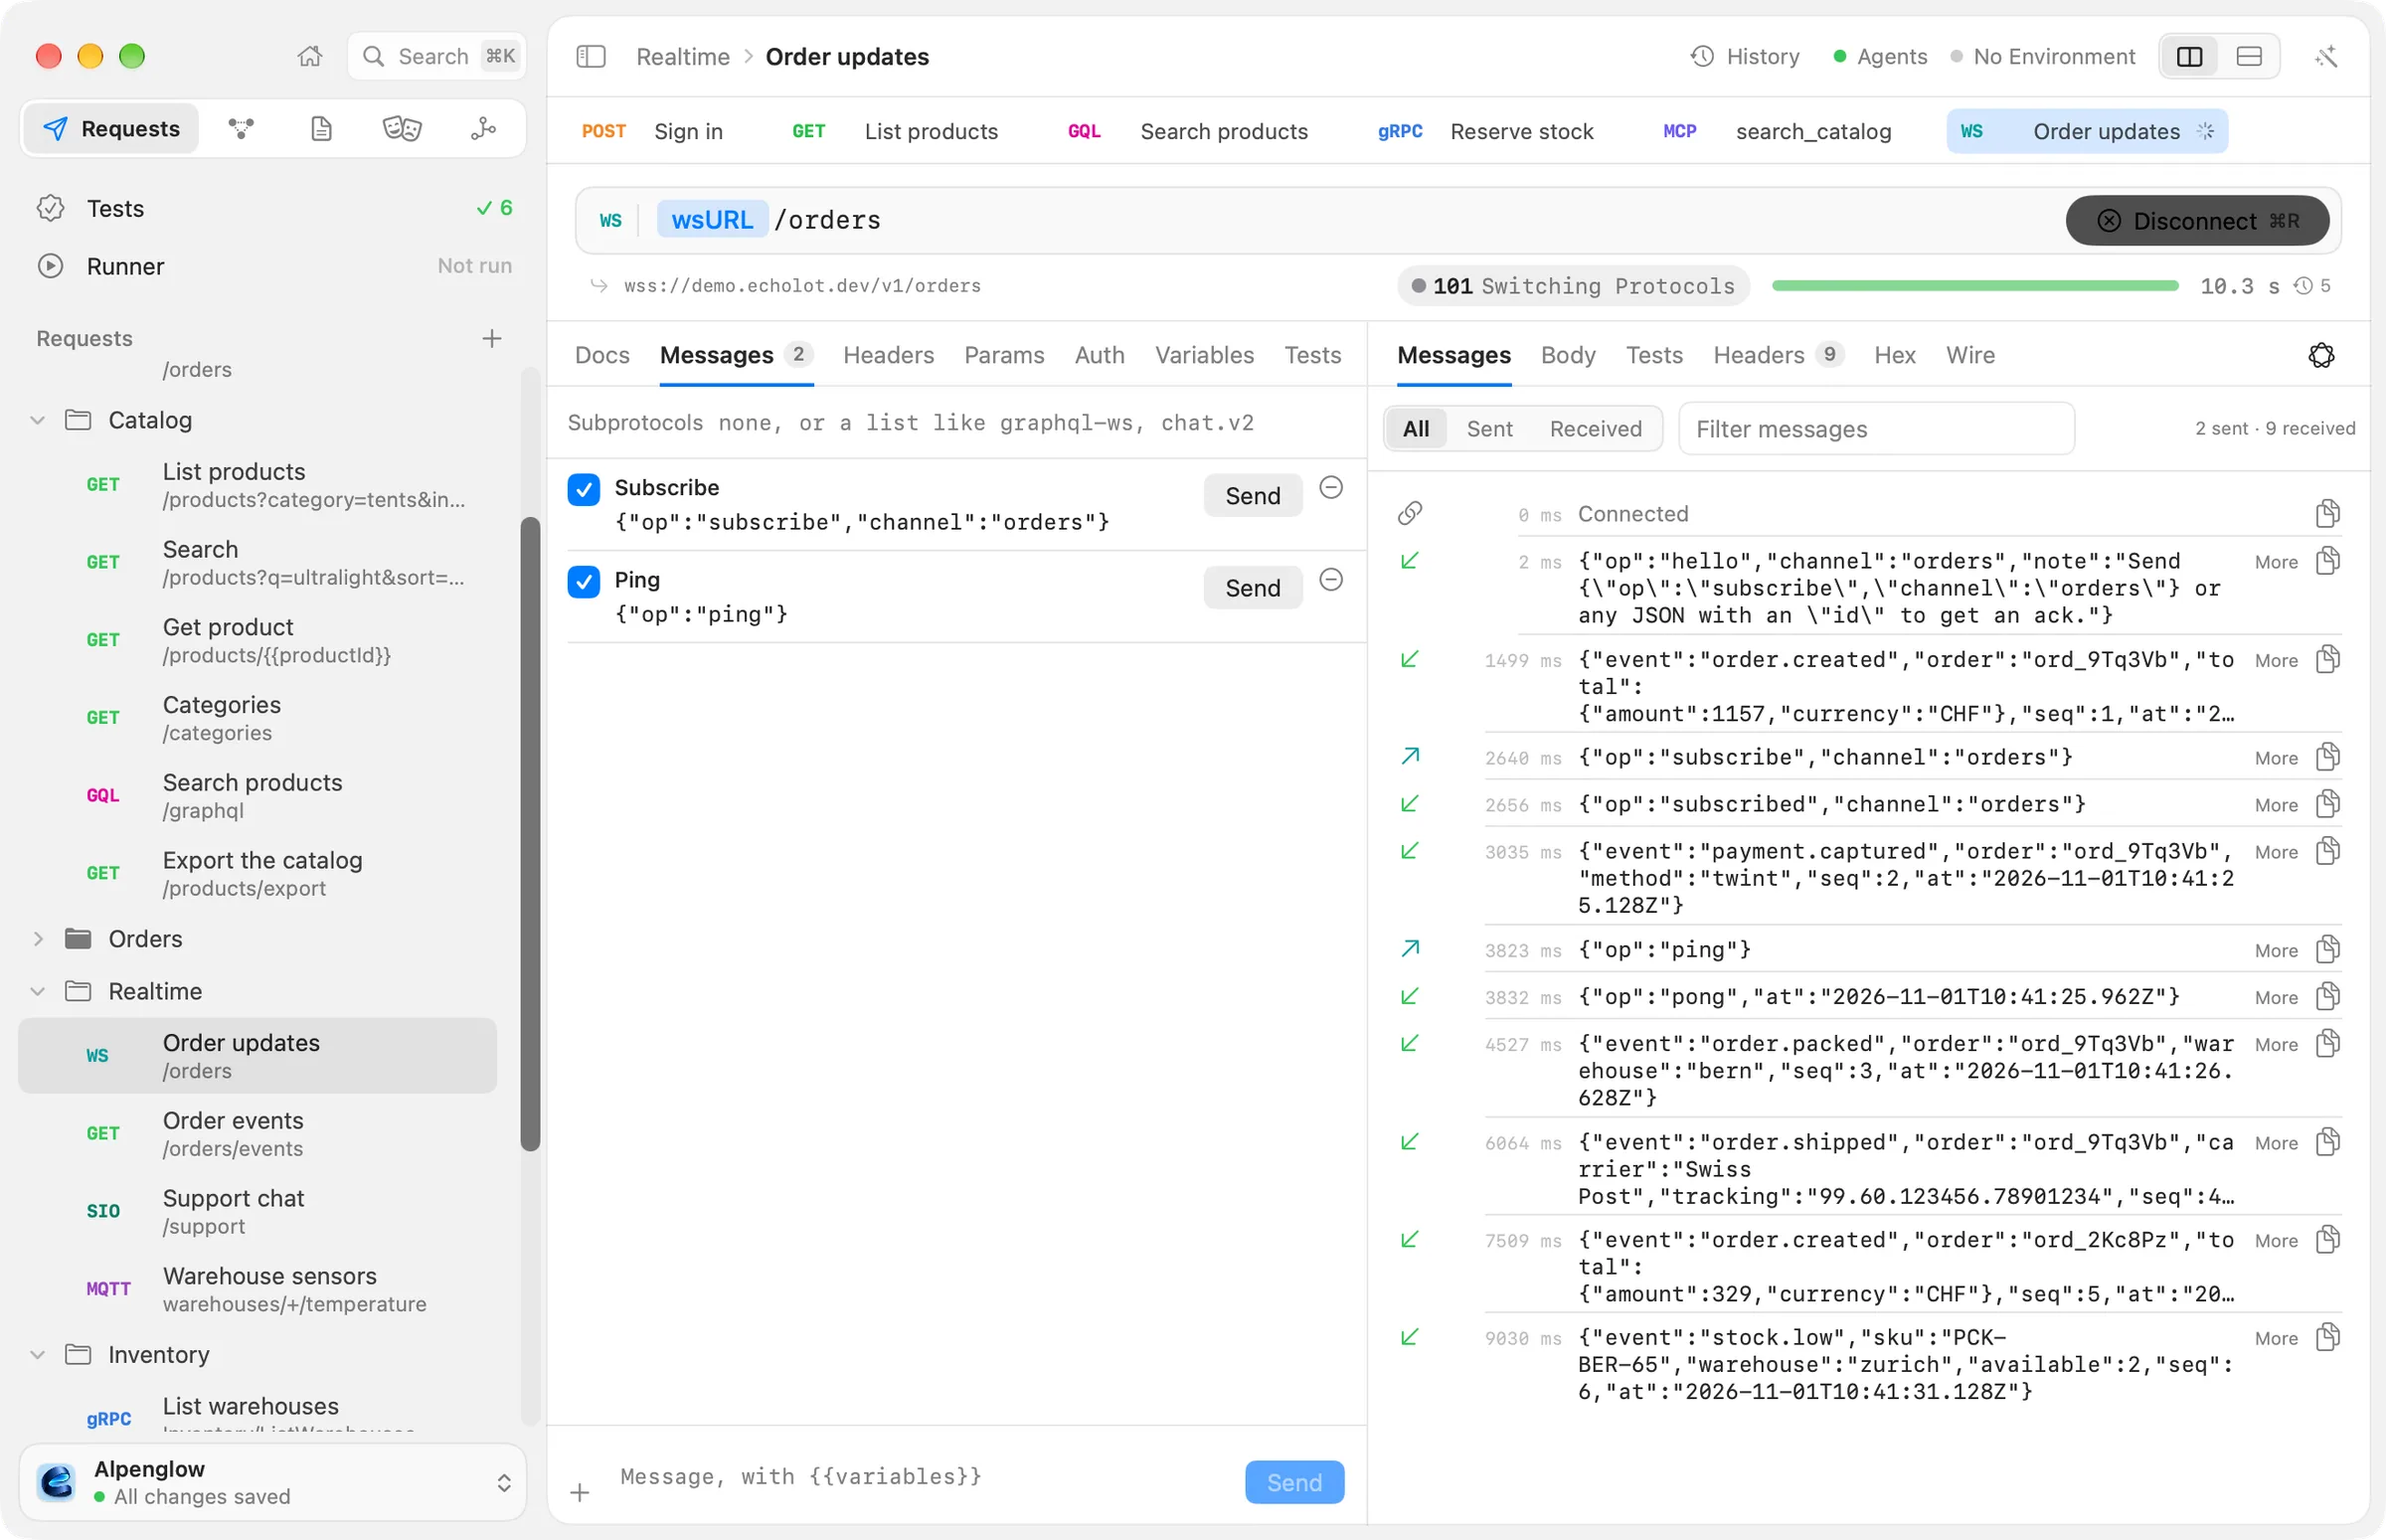
- Open Realtime › Order updates. Its URL is
{{wsURL}}/orders, which iswss://demo.echolot.dev/v1/orders. - Choose Connect (⌘R). The button becomes Disconnect.
- The response's Messages tab fills: a link icon for the open connection, the server's
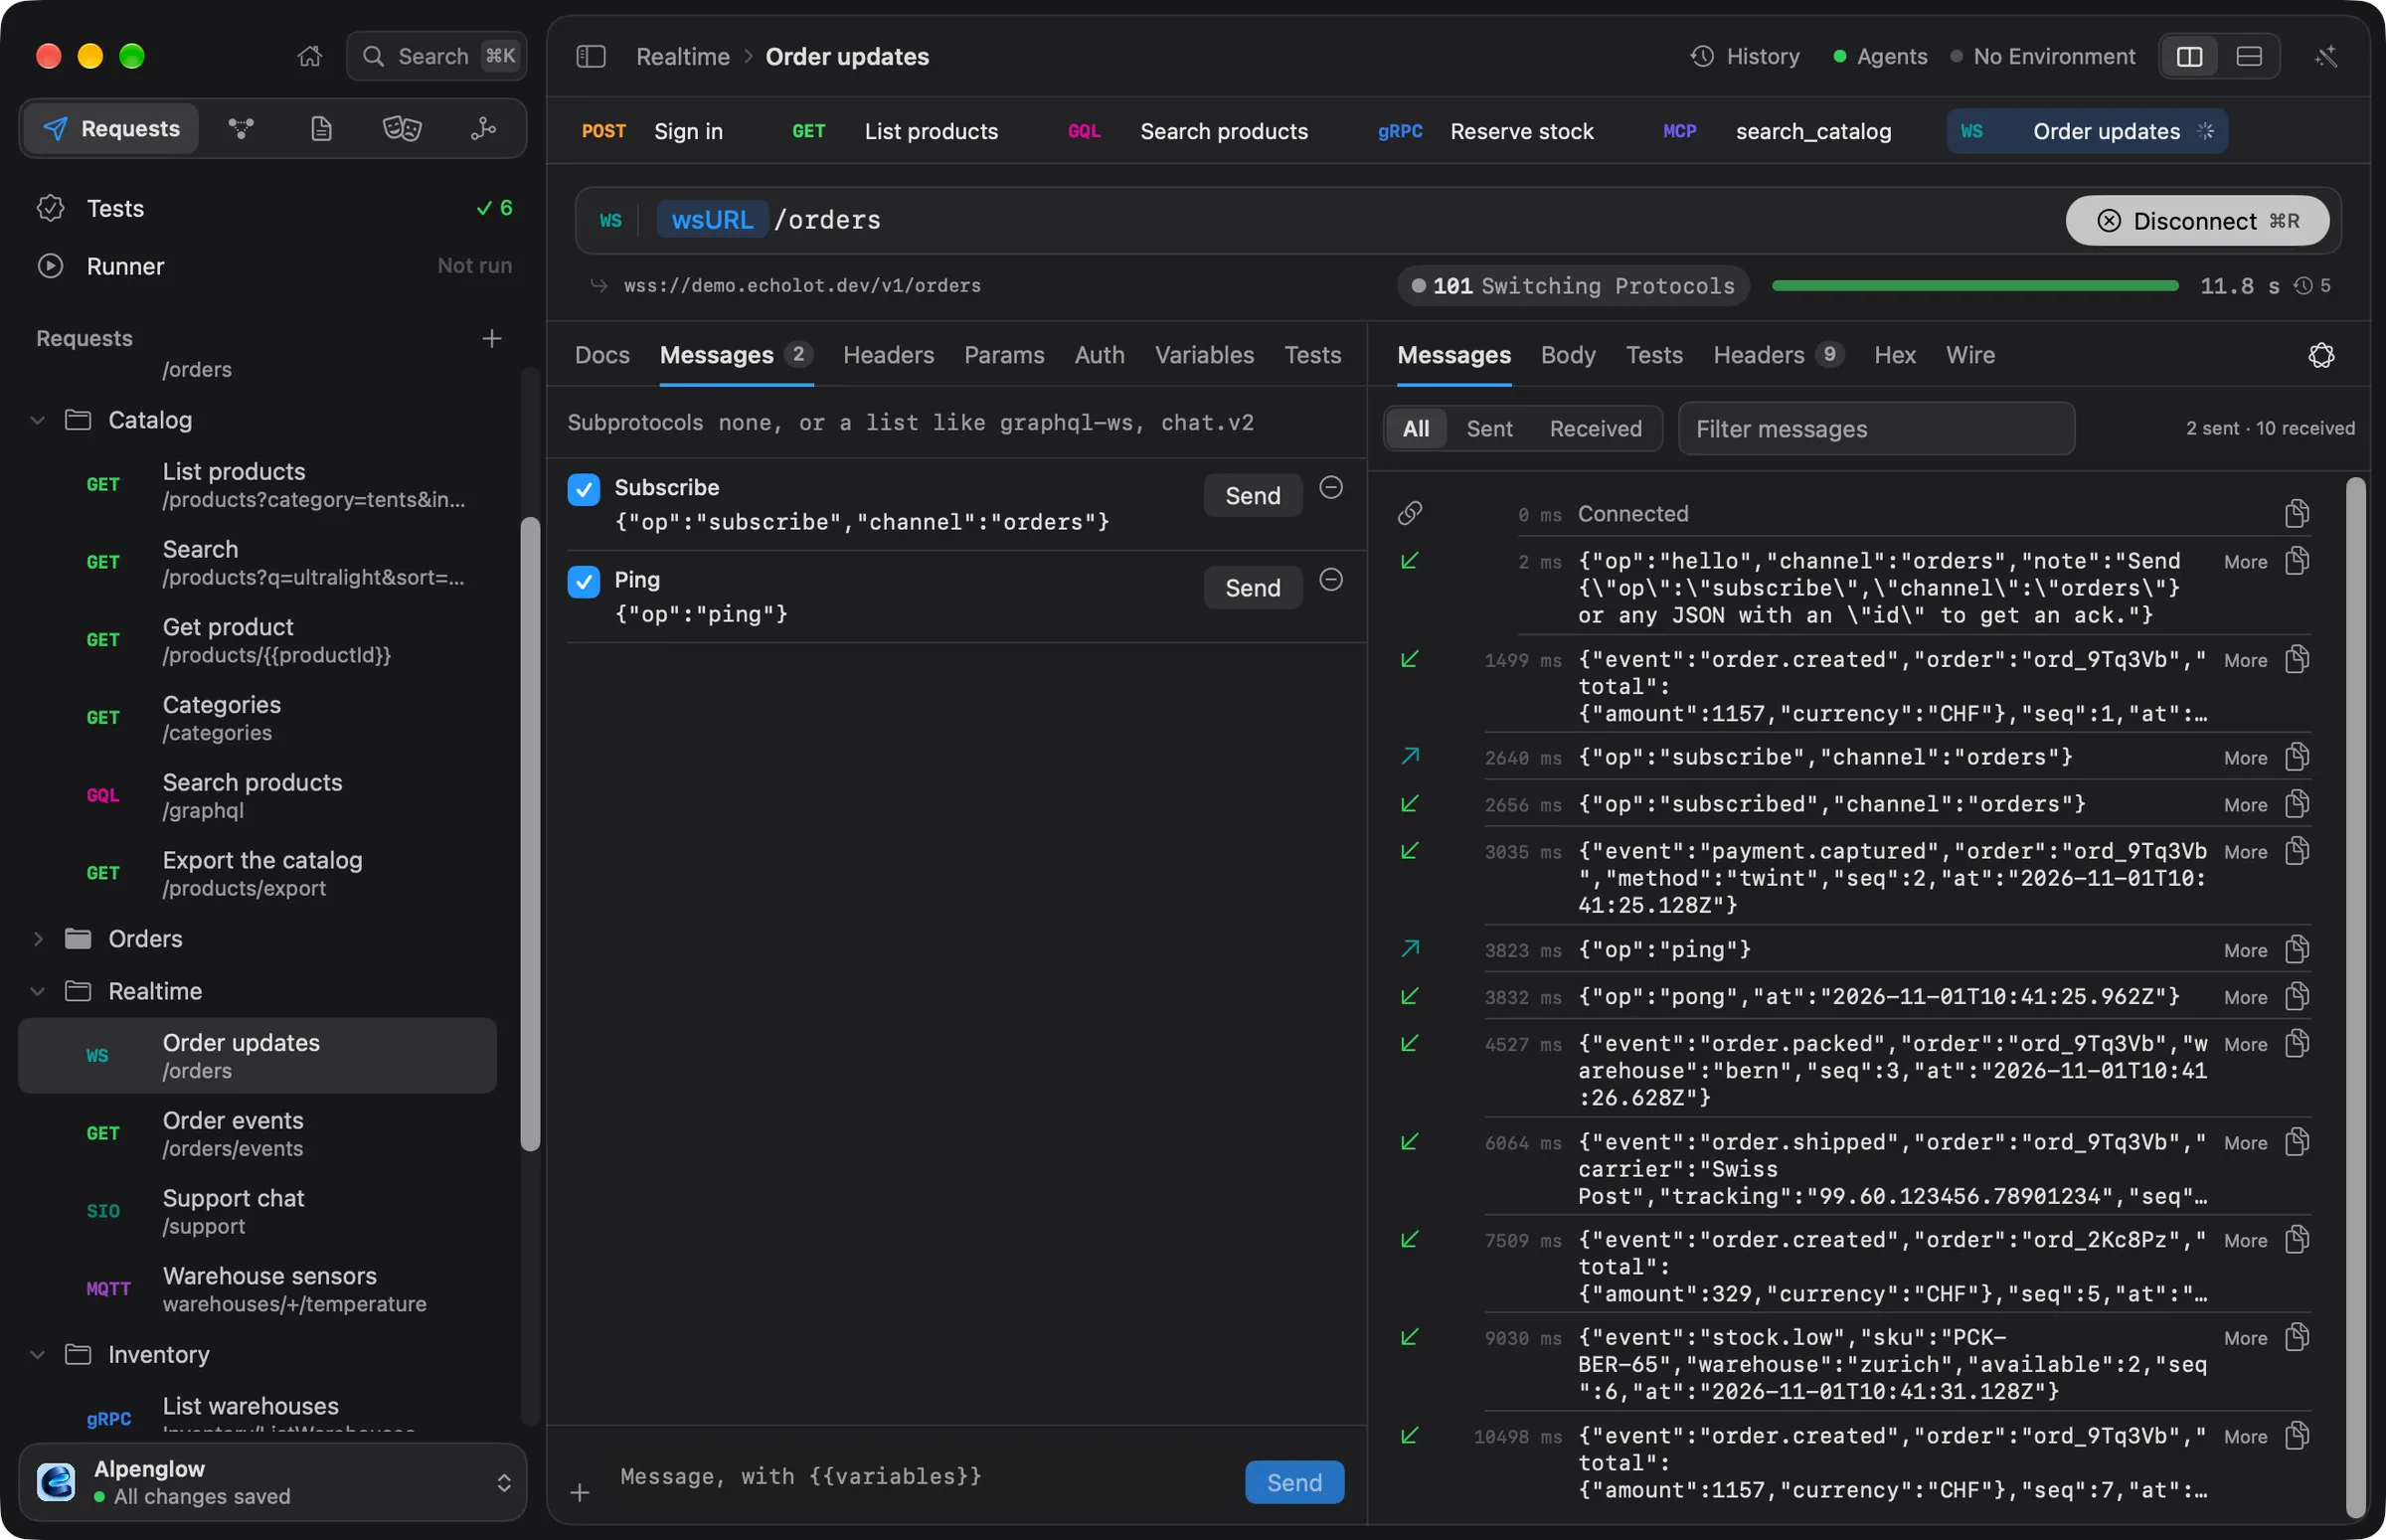
hello, then an order event every 1.5 seconds, such as{"event": "order.created", "order": "ord_9Tq3Vb", …}. Sent messages have an arrow pointing up, received ones a green arrow pointing down. More unfolds a long JSON message. - In the request's Messages tab, the saved message Subscribe holds
{"op":"subscribe","channel":"orders"}. Choose its Send. The server answers{"op": "subscribed", "channel": "orders"}. - Type into the composer at the bottom:
{"id": 42, "text": "hello"}and choose Send (⇧⌘↩). The server acknowledges it with{"op": "ack", "id": 42}. Choose + to save the message for later. - Narrow the log with All, Sent and Received, or type
shippedinto Filter messages. - Choose Disconnect. The log ends with Closed by Echolot.
The demo closes a session after three minutes (1000 Demo sessions last 3 minutes), and closes it with 1008 if
you send more than 20 messages in ten seconds. Saved messages with Send in runs ticked are sent in order, after
connecting, when the request runs in the Runner or the command-line tool. More in
WebSocket and SSE.
2. Server-Sent Events: the same feed as a stream
- Open Realtime › Order events. It is a plain HTTP request,
GET {{baseURL}}/orders/events, with the headerAccept: text/event-stream. - Choose Send. The response opens on its Events tab: Listening… Stop ends it.
- An event arrives every second, each in its own card titled with its number and name, such as 1. order.created,
with id 1 under it. After 20 events the server sends
endand closes the stream. - To stop earlier, choose Cancel (⌘.).
To resume after an event, add the header Last-Event-ID with the last id you saw, say 15, and send again. The
server sends 16 to 20. Typing Last-Event-ID in the Headers tab offers {{lastEventId}} as its value; give that
variable a value, or type the number.
3. Socket.IO: the support desk
Start the local servers first (bun run realtime). They print
Alpenglow realtime: Socket.IO on http://localhost:3001/support, MQTT on mqtt://localhost:1883.
- Open Realtime › Support chat. Its URL is
{{realtimeURL}},http://localhost:3001. In its Events tab, Namespace is/support; the URL bar's method menu sets the Server version (Socket.IO 4). - Choose Connect. Three events arrive:
welcomewith the agent's name and queue,typing, thenmessage: "Grüezi! How can I help with your order?" - The saved event Say hello emits
messagewith{"text":"Grüezi!"}. Tick its Ack box, so the server is asked to acknowledge it, and choose Emit. - The log shows the acknowledgement,
{"id": "msg_31", "delivered": true}, and a moment later Heidi's answer: "Your Matterhorn 2P ships tomorrow from Bern." - To emit an event you haven't saved, type its name in the composer's event field and its arguments as JSON, and choose Emit (⇧⌘↩).
Each log row names the namespace, the event, and the acknowledgement's number when there is one. Filter events
narrows the log. A server that asks you to acknowledge one of its events gets an Acknowledge button on that row.
An auth payload, such as {"token": "{{token}}"}, goes in the Auth field of the Events tab. See
Socket.IO.
4. MQTT: warehouse sensors
The same local servers run an MQTT broker on localhost:1883 that publishes three warehouses' temperatures every 1.5
seconds.
- Open Realtime › Warehouse sensors. Its URL is
mqtt://{{mqttHost}}, and the method menu's Protocol is MQTT 3.1.1. - Its Subscribe tab has the subscription
warehouses/+/temperatureat QoS 1, with Subscribe on connecting ticked.+matches one level of the topic. - Choose Connect. Messages arrive for
warehouses/zurich/temperature,warehouses/bern/temperatureandwarehouses/chur/temperature, such as{"celsius": 6.1, "humidity": 44, …}. - Use the All Topics menu to show one warehouse only.
- In the Subscribe composer, type
warehouses/status, leave QoS 0, and choose Subscribe. One message arrives at once,{"online": 3}, marked retained: the broker kept it for anyone who subscribes later. - In the Publish tab, set the topic to
warehouses/bern/door, the payload to{"open": true}, and choose Publish (⇧⌘↩). Subscribe towarehouses/#to see it come back:#matches every level below.
The Connection tab holds the Client ID, the clean session setting, Keep alive and a will. A broker's user name and password go in the Auth tab as Basic auth; keep the password in a secret variable. The command-line tool speaks MQTT too:
echolot mqtt subscribe mqtt://localhost 'warehouses/#' --count 5See MQTT and echolot mqtt.
5. Side by side
Each request has its own tab. Keep Order updates, Support chat and Warehouse sensors open in three tabs and connect each: every connection stays open while you switch between them. When a session closes, Echolot keeps it in History with the whole message log, so you can read it again later (⌘Y).
The local servers also serve gRPC: run bun run grpc and send the requests in Inventory. Watch stock streams
a dozen stock levels and ends. See gRPC.
Next steps
- WebSocket and SSE: subprotocols, binary messages, checks on sessions.
- Socket.IO and MQTT: every setting.
- Test an API and run it in CI: sessions run in the Runner too, sending their saved messages.
Let an agent use your workspace safely
Connect Claude Code or another MCP client to a workspace, decide what it may do, approve its sends, protect an environment, and keep secrets out of its reach.
Coming from Postman
Import a Postman collection and its environments, learn what maps to what, run it, and export back to Postman.