 Echolot
Your first request
Create a workspace, send a request to the demo API and read its response, in a few minutes.
This page takes you from an empty Echolot to a sent request and a read response. It uses
the demo API at https://demo.echolot.dev, a pretend outdoor-gear shop that answers
without any setup.
1. Create a workspace
A workspace is a folder that holds your requests, one file each. Create one first.
In the welcome window, choose New Workspace… (or File › New Workspace…, ⌥⌘N).
Name it, for example Alpenglow.echolot, pick where to keep it, and choose Create.
The workspace opens in its own window. It is empty, so the page says This workspace is empty.
2. Make a request
Choose New Request on the page, or press ⌘N. A request named New Request appears in the
sidebar with its name selected. Type List products and press Return.
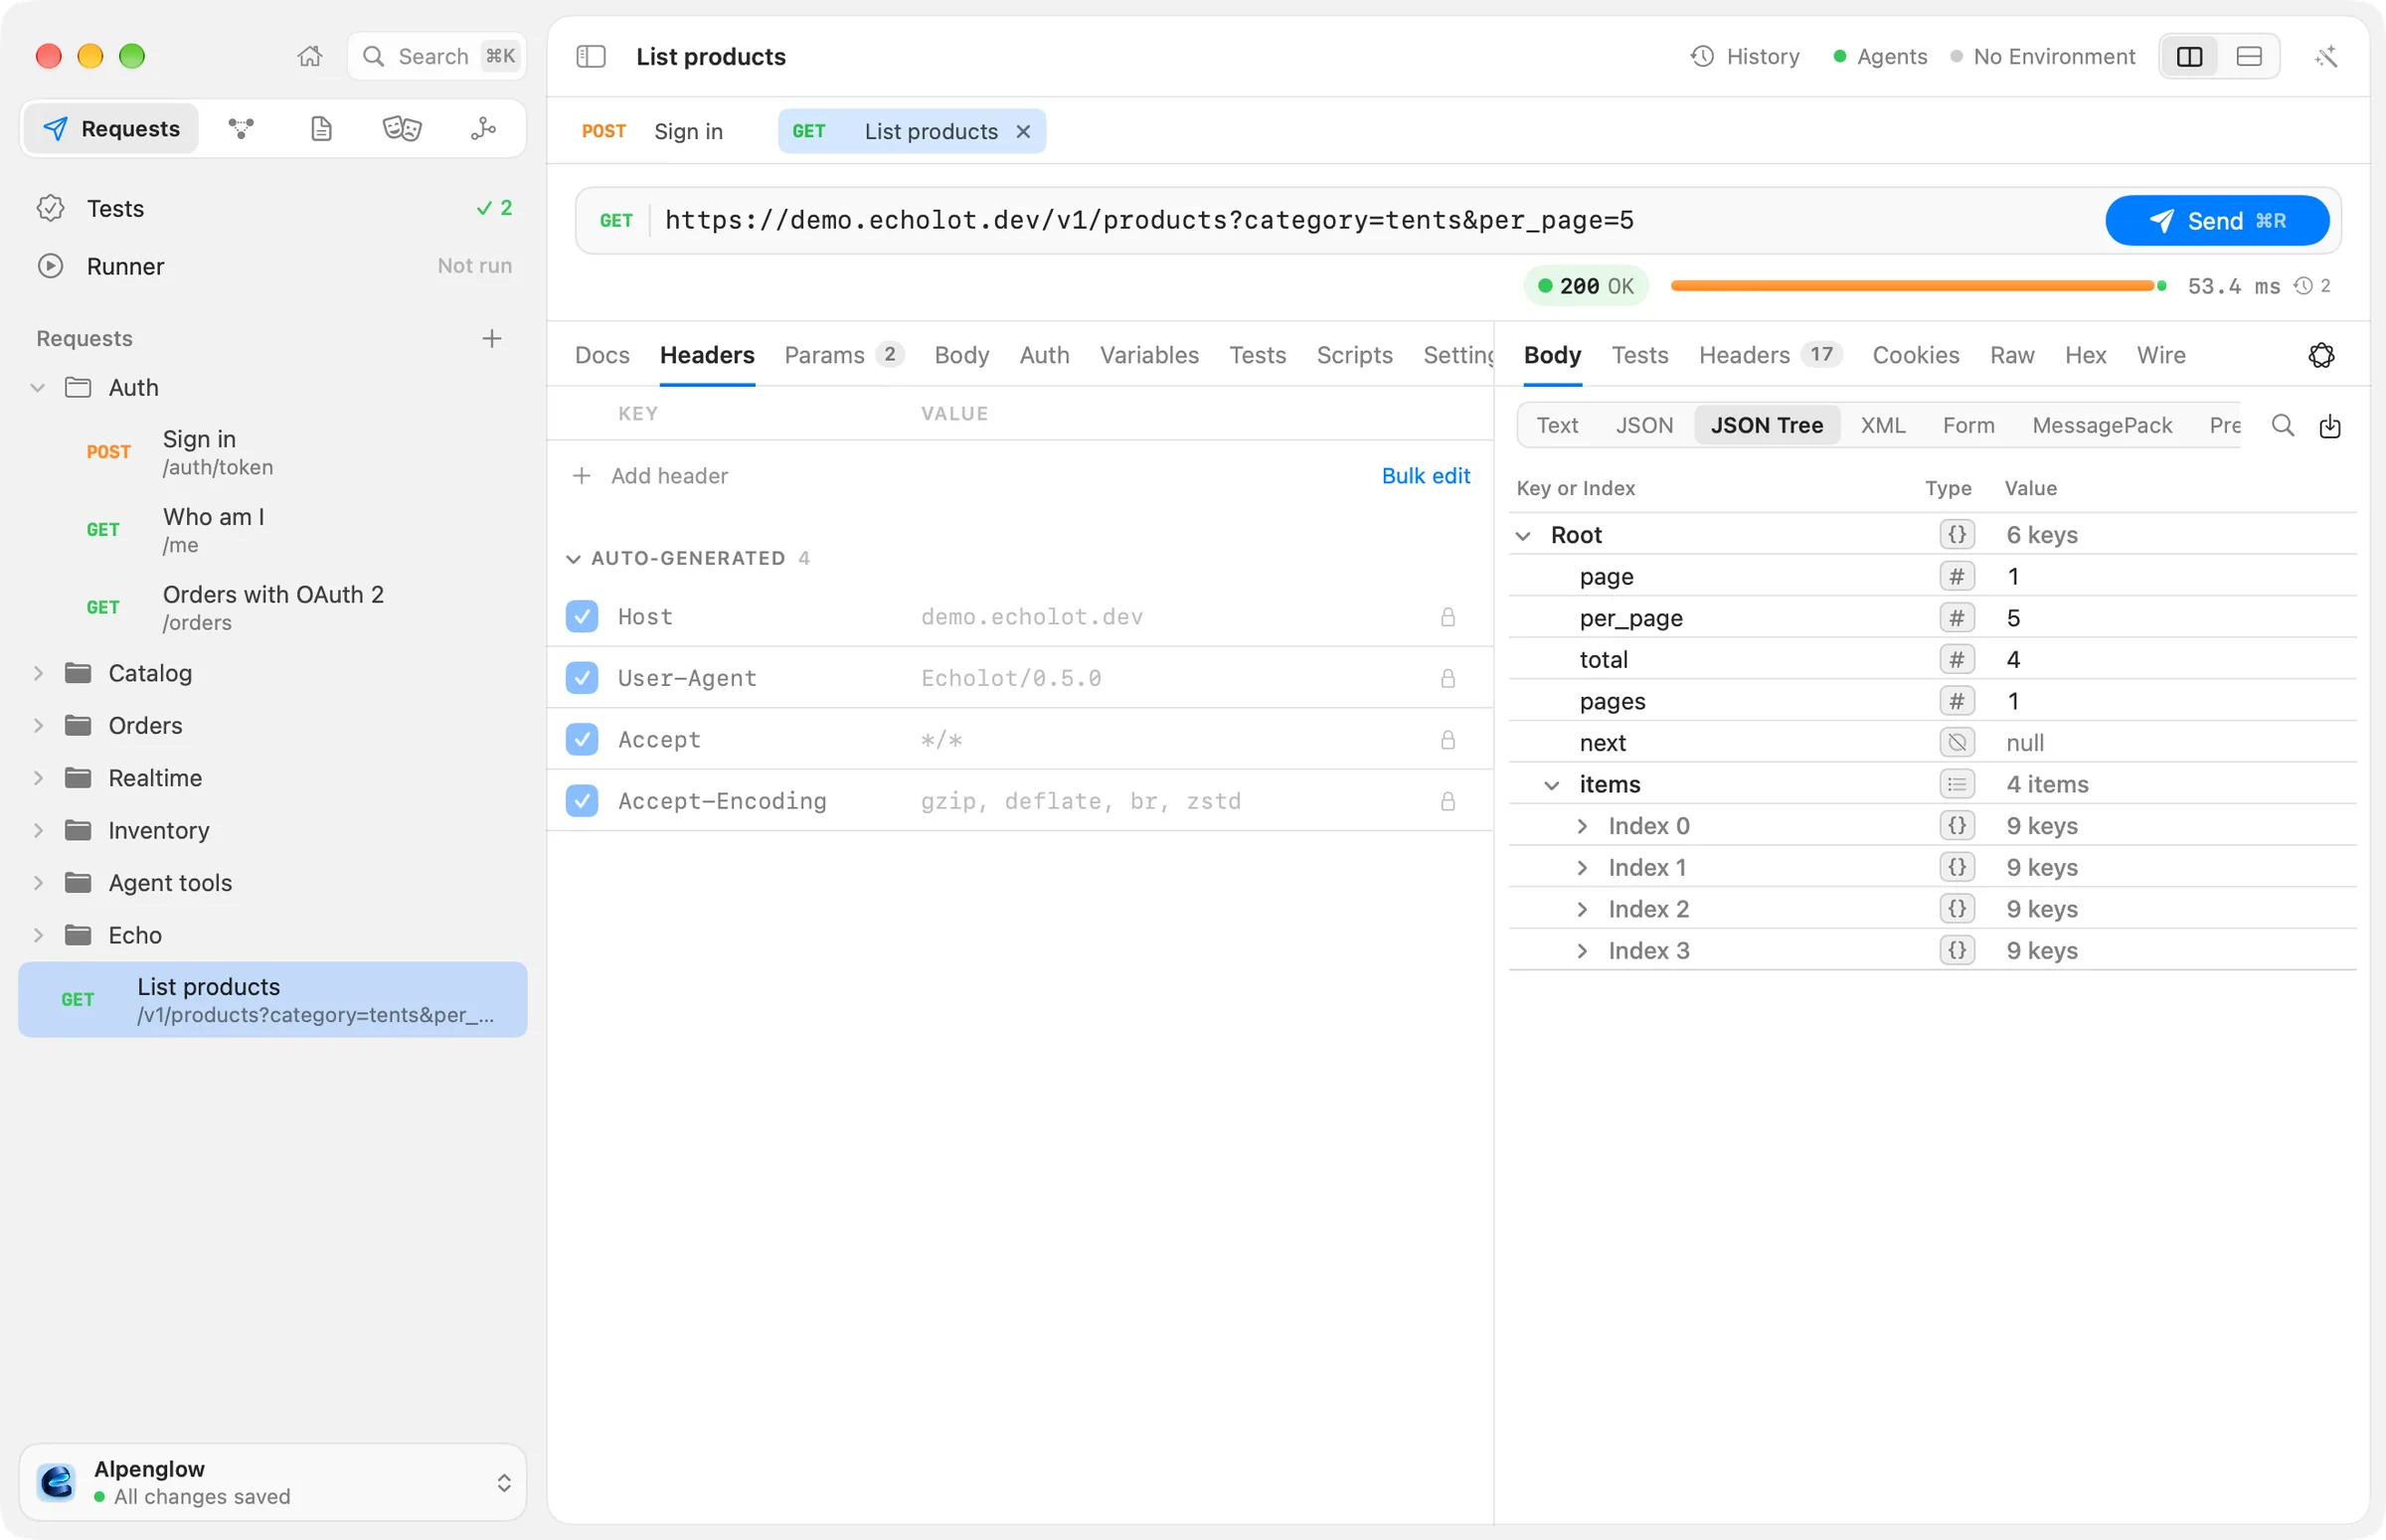
Click the address field at the top of the page (it reads Enter a URL, use {{variables}}) and type:
https://demo.echolot.dev/v1/products?category=tents&per_page=5The method is GET, which is what you want. The Params tab now lists category and per_page; you can edit
them there or in the address.
You don't need to save. Echolot writes the request to a .req.toml file in the workspace folder a moment after you
stop typing, and the workspace name at the bottom of the sidebar says All changes saved.
Already have a cURL command?
Paste it into the address field. Echolot fills in the method, address, headers, body and auth from it, and lists anything it could not use under the address bar.
3. Send it
Press ⌘R, or choose Send. ⌘↩ sends too. While it runs, Send becomes Cancel (⌘.).
4. Read the response
The response pane sits beside the request (or below it, if you choose the stacked layout).
- The line above the response shows the status (
200 OK), the time and the size. Rest the pointer on it for the details: the sizes, the time each phase took (DNS, Connect, TLS, Waiting, Transfer), the TLS connection and any redirects. - Body shows the body. The View choices above it switch between the ways to read it: Text, JSON (formatted), JSON Tree, and for other content XML, Form, MessagePack or Preview. Echolot picks the first one from the content type. ⌘F finds text in the body.
- Headers lists the response headers. The demo API puts the total in
X-Total-Countand the next pages inLink. - Cookies lists the cookies the response set.
- Raw and Hex show the bytes as received. Wire shows the whole exchange as it went over the network, sent and received.
- Tests shows the results of the request's checks, once it has some.
Every response is also kept in the request's history (⌘Y), so you can come back to it and compare it with the next one.
5. Add a check
Checks run after every send and tell you when an API stops answering as it should.
- Open the request's Tests tab.
- Choose Generate from Response…. Echolot proposes checks from the response you just got: the status, the content type, values in the JSON.
- Tick the ones you want and choose Add N Tests (the button counts the checks you ticked).
- Send again. The Tests tab of the response shows each check passed or failed.
Scripts and tests covers every kind of check.
Next steps
- Send a body: create another request, set the method to POST, the address to
https://demo.echolot.dev/echo/anything, and type some JSON on the Body tab. The demo echoes back what it got. - Copy the request as a cURL command with Request › Copy as cURL (⌥⌘C), or generate code for it with Request › Generate Code… (⌥⌘G).
- Put the server address in a variable and add environments: Environments.
- Learn your way around: The window.
- Follow a longer walk-through: Your first workspace.
The demo API is shared
It accepts 120 requests a minute from each address (10 a minute for its large, slow and streaming endpoints). Over
the limit it answers 429 Too Many Requests with a Retry-After header; wait that many seconds and send again.